Reset your Supermicro IPMI password to default
If you’re anything like me, you change default credentials because that’s a great idea. If you’re vaguely like me, you may have misplaced these credentials. So, you’ve changed your Supermicro IPMI username and/or password and now you can’t authenticate because you forgot them. Luckily, you have physical access to the server, which means you can reset them to their defaults.
You’ll need to create a bootable USB with FreeDOS on it. Drop the IMPICFG utility onto the USB. Boot to FreeDOS on the USB and use the IPMICFG utility to reset the IPMI credentials back to default.
At a high level, here’s what you’ll do:
- Create a bootable FreeDOS USB.
- Get IPMICFG and drop it onto the USB.
- Boot to FreeDOS.
- Use IPMICFG to reset the username and password.
Create a bootable FreeDOS USB #
There’s a few ways you can make a USB boot to FreeDOS. The often suggested tools are
Rufus and
Etcher. Using Rufus is slightly easier because you can just set the Boot selection menu item to FreeDOS and away you go. If you’re using Etcher, then you’ll need to
download FreeDOS and write that image to the USB.
I won’t go into more details, but there’s a million and one guides on how to do this - just make sure the USB you’re going to use doesn’t have any data you want on it, because it will get destroyed.
Get IPMICFG and drop it onto the USB #
Download the IPMICFG utility from the
Supermicro download center. You’ll need to set Select OS: to DOS, Windows, Linux, UEFI, FreeBSD, click Download, click Continue as Guest, and then enter a bunch of details. No need to bleed your personal information, go to
10 Minute Mail to get a random email and paste the email into the Work Email, First Name, Last name, and Company Name fields. Finally, acknowledge the EULA, satisfy the CAPTCHA, and click Submit.
Extract the .zip file you downloaded, and copy the whole directory into the root of your FreeDOS USB. You should have a directory called something like IPMICFG_1.34.2_build.230224 sitting on your USB.
Safely eject your USB.
Boot to FreeDOS #
Plug the USB into your Supermicro server, and turn it on. When you see the Supermicro splash screen, mash F11 like you’ve already lost that QTE three times in a row to invoke the Boot Menu.
The boot devices you see might be slightly different to what I get but you want to boot to UEFI: Built-in EFI Shell.
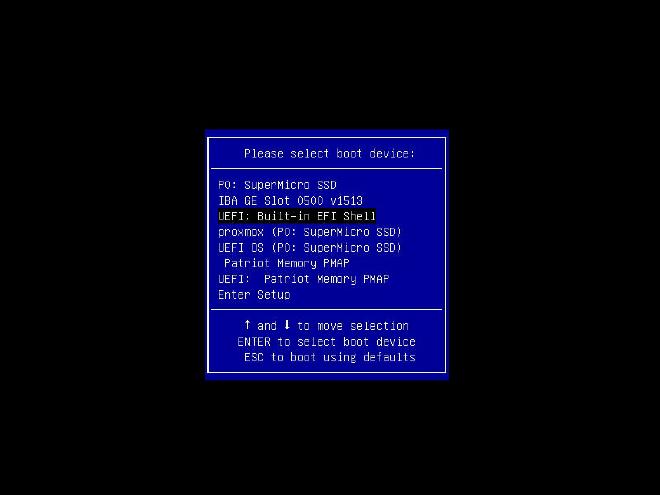
The screen you want to see looks something like this. The exact details will be different depending on your server, but you should see a bunch of devices.
Use IPMICFG to reset the username and password #
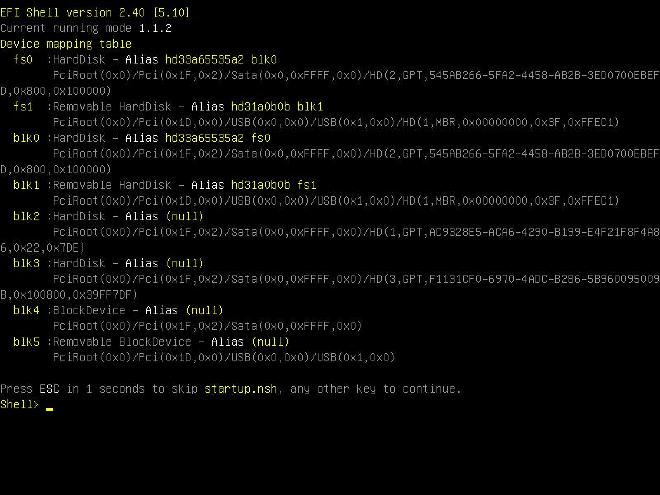
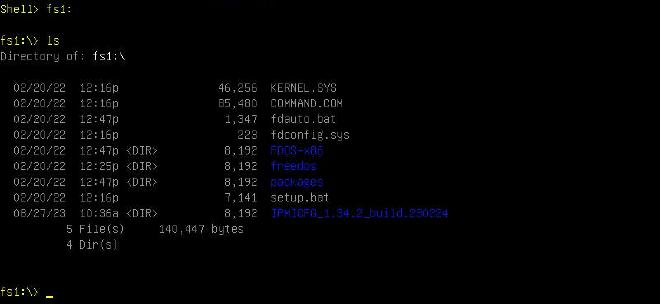
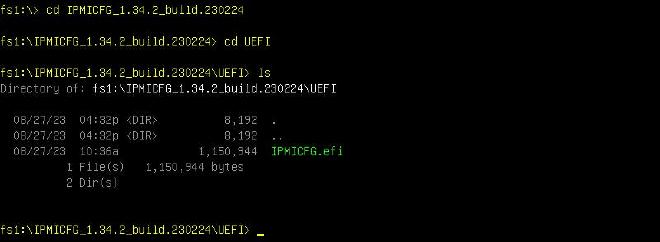
In the list of devices, you need to identify which one is the USB. In my case, it’s fs1. To open the device, you type the name of the device, including the colon, and press enter. So we type fs1:, press Enter, and our prompt now shows fs1:\. We can run ls to list the directories, and we can see our IPMICFG_1.34.2_build.230224 directory.
Now we want to navigate to the utility, and run it. We can cd IPMICFG_1.34.2_build.230224 to change directory, and then cd UEFI to change directory again. Now we can ls to list what’s in this directory, and we should see IPMICFG.efi, which is our utility.
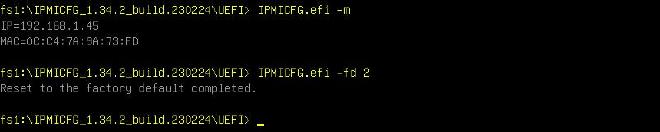
We can type IPMICFG.efi -m which will spit out our IP and MAC just to validate that everything is working correctly. To actually reset the IPMI to defaults, type IPMICFG.efi -fd 2.
If you’re interested, the IPMICFG_UserGuide.pdf in the download has all the commands for the IPMICFG utility.
Errors #
If you get an error like ls/dir: Cannot open current directory - No Mapping it’s likely because you are trying to cd to the USB - the command is just the device name. In this case, you would only type fs1: and then press enter.
Resources #
- Serve The Home - Reset Supermicro IPMI password
- XenSpec - Configuring IPMI with IPMICFG
- IPMICFG Overview and commands
- There was another resource which I’ve lost :(